Introduction
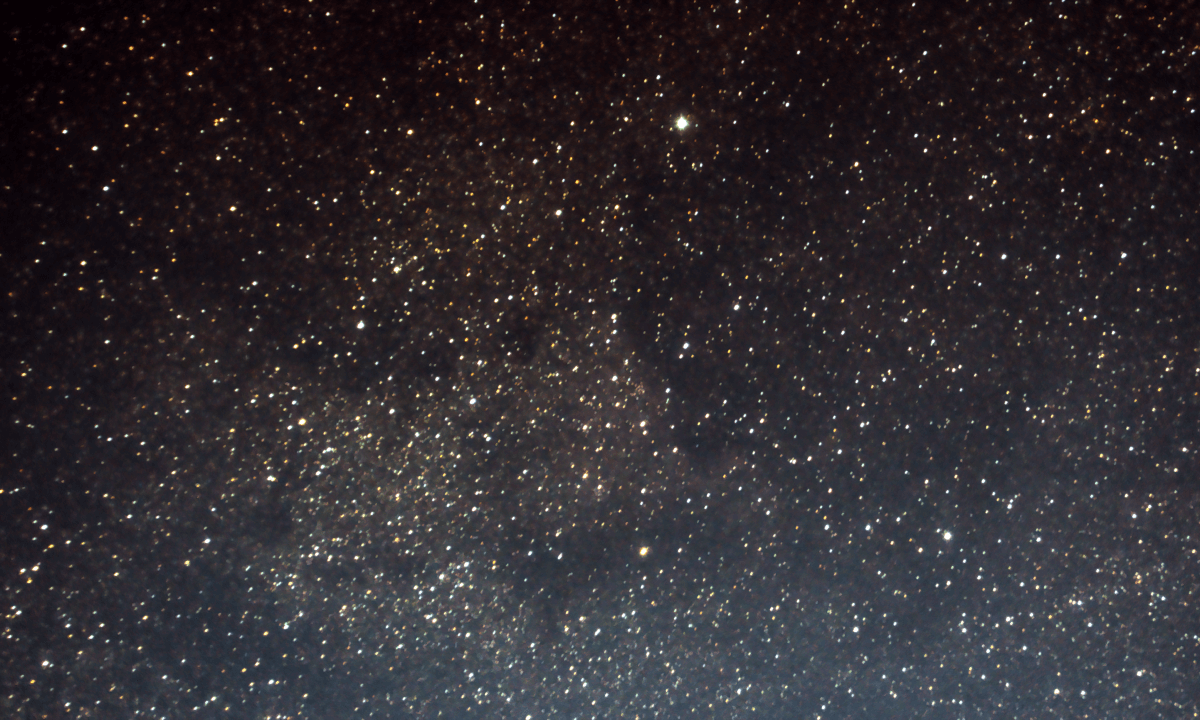
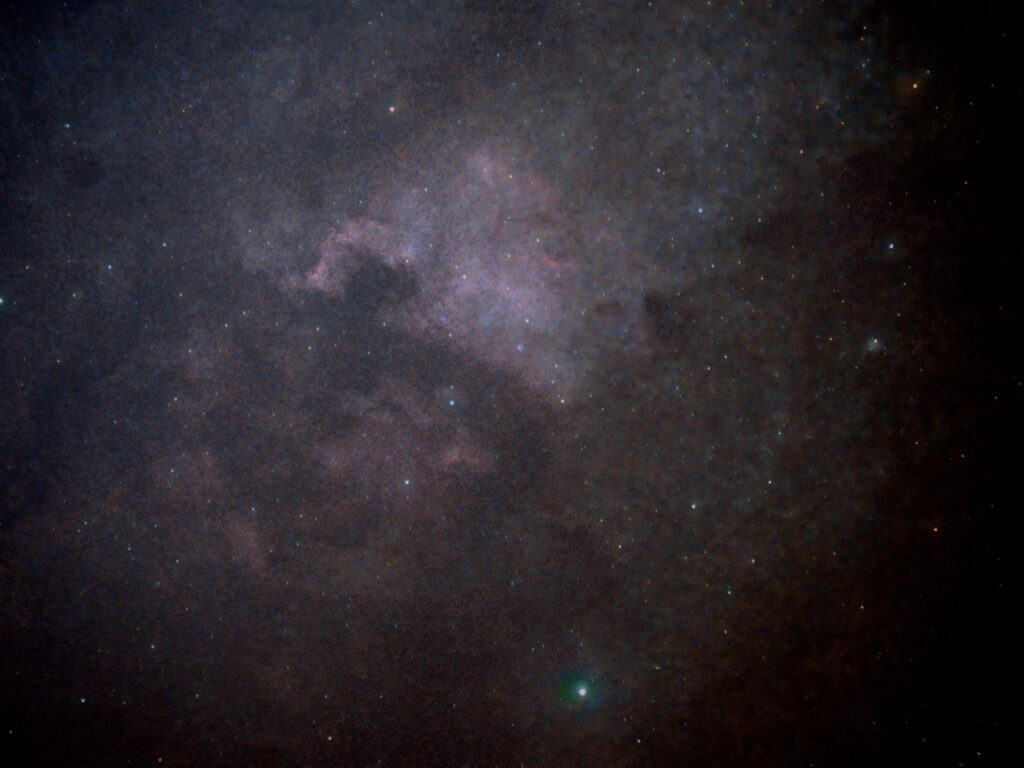
The following two images were taken on the 7th of July 2024, and then the 11th of August 2024. The former is the result of my first-ever attempt to photograph a deep sky object, and the latter is my most recent.
I’d like to talk about the differences between these two images, and what the differences were in my approach, equipment, and post-processing to yield such a drastic difference.
My First Attempt at NGC 7000
Camera: Nikon D5600
ISO-Speed: 400
F-stop: f/5.6
Exposure time: 16 minutes (8 seconds per exposure)
Description: A field of stars with an orange cloud-like shape in the middle, NGC 7000 (the North American Nebula).
The Approach
For more details on this shoot, check out my logs from that evening.
This image was a feat of passion for me. At the time, I had very little equipment and almost no knowledge of post-processing. Here are some of the key aspects of my first-ever shoot:
- The equipment I had was:
- Nikon D5600 DSLR camera
- 18-55mm kit lens
- A static mount without tracking
- I was shooting with:
- ISO: 400
- F-stop: f/5.6
- Exposure time: 8 seconds
- Focal length: 55mm
- I edited the image by…
- Stacking only light frames in Deep Sky Stacker
- Exporting the stacked image into G.I.M.P
- Stretching the image via levels and curves
- Adjusting saturation and applying denoise filters
My Retrospective Thoughts
Looking back on this image, I’ll admit that it isn’t impressive. However, it’s very special to me personally as it will always be my first attempt. It’s safe to say that my whole workflow has entirely changed since this was done. Given my technical and theoretical limits at the time, I’m proud of this as my starting point.
What I’d do Differently
With my experience now and factoring in my equipment limitations, if I were to do this again with the same gear I would:
- Take calibration frames: Lights, darks, biases.
- Edit in Siril, using the techniques mentioned in my most recent attempt later on.
My Most Recent Attempt at NGC 7000
Camera: Nikon D5600
ISO-Speed: 1600
F-stop: f/5.6
Exposure time: 47 minutes (47*60)
Description: The North American Nebula and the Pelican Nebula.
The Approach
For more details on this shoot, check out my logs from that evening.
This image is much clearer. It shows more than just the silhouette of the North American nebula, as you can see the colours, and even the Pelican Nebula that lives right next to it (the smaller, similar-coloured nebula below it).
To take this image I had some pretty substantial upgrades to my equipment: A tracking mount for long exposures and a larger focal-length lens. Then I had an arguably comparable improvement in my editing knowledge and techniques. Originally, I was just using DeepSkyStacker and G.I.M.P to stack and stretch the image, whereas I’m now using Siril with StarNet for most of the work, with G.I.M.P only doing a small portion of the final details.
- The equipment I had was:
- Nikon D5600 DSLR camera
- 18-200mm lens
- Sky-Watcher Star Adventurer Mini
- I was shooting with:
- ISO: 1600
- F-stop: f/5.6
- Exposure time: 60 seconds
- Focal length: 200mm
- I edited the image by…
- Stacking lights, biases, and dark frames in Siril
- Calibrating colours using Siril
- Creating and separating a star mask using StarNet
- Stretching the starless layer in G.I.M.P
- Layering the star map back on top of the starless layer
My Post-Processing Technique
Siril is the tool that redefined my results here. It feels like it was built to help people like me who aren’t professional photographers or who lack experience, by providing an accessible suite of tools in an accessible, digestible way. Siril’s integration with StarNet was also a game-changer in itself.
StarNet, from what I’ve experienced, is a tool built with TensorFlow (a machine learning Python library) which allows you to ‘extract’ the stars from your image. When editing, the stark contrast between the stars and the blacks of space is huge, which makes editing tricky at times.
By separating the stars into their own layer, you get such a huge improvement in your control over the editing of nebulosity, without over-exposing your stars. The final cheery on top is that you can then re-add your stars at a slightly reduced intensity, allowing the nebula to stand out more than it otherwise would have.
Advice for People Looking to Improve
If you’re looking to improve your results, or are looking to take your first steps into astrophotography, my advice would be to put as much time as you can into learning the editing and post-processing techniques. A big shock to me, when I started, was how the post-processing felt almost as complicated as the shoot itself.
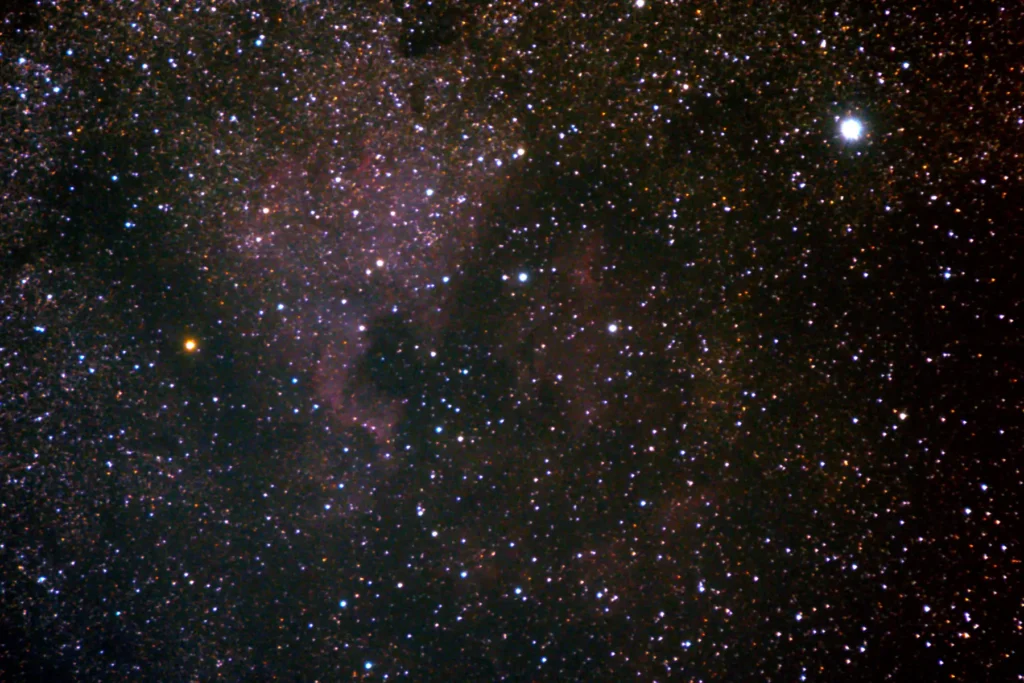
I did two edits of my final image from 11th August. The second of which you’ve seen above. The original was done before I discovered Siril and StarNet. Bare in mind that these were edited from the exact same images, and compare this to the one I showed earlier:
Camera: Nikon D5600
ISO-Speed: 1600
F-stop: f/5.6
Exposure time: 47 minutes (47*60)
Description: The North American Nebula and the Pelican Nebula.
I acknowledge that some people might prefer the way this looks. But whether you prefer it or not, as you can see, the result is so incredibly different that you might not have thought it was the exact same shoot. It shows that the editing stage of astrophotography is a creative process where two individuals will almost always create drastically different results based on their preferences, methods, and tastes.
The other thing I’d encourage is to ensure you take calibration frames for every single shoot you do. These frames remove camera noise, dust, and other artefacts from your final image by intentionally capturing these imperfections so the stacking process can factor them in. Less noise means a nicer image!
Closing Thoughts
I’m really happy with my progress so far in this hobby. I hope that there is some valuable information here for anyone on a similar learning journey. While I’m proud of my latest result, I’m excited to see how I can improve it over the next few months.


0 Comments